Ghost Case part 2
Complete Walkthrough
Hello everyone and welcome to Part 2 of our walkthrough for the “Ghost Case” a room escape game created by the Dark Dome. The Ghost Case is the fourth game in the series and, just like the previous games, the story is set in Hidden Town, which is filled with all kinds of mysteries. In this walkthrough, we will show you how to solve all the puzzles and finish the game. The story of the Ghost Case is a continuation of the story of the second game “The Girl in the Window” so I would strongly suggest you play “The Girl in the Window” before starting this story. I don’t want to reveal too much, but it might be a good idea to also play the third game in the series “Nowhere House” before jumping into the “Ghost Case” because there’s also a connection between these two stories.
NOTE: The first part ended after we solved the “Pawn” puzzle and found the “Projector slides” and letter to the “Lian” (Murder House puzzles mostly cleared). The next step is to go back to the Police Station and take a look at the slides, and that’s where Part II begins. We will end the second part when detective Ren finds the strange ring inside the crypt. The third part will start with detective Ren traveling to the police station to investigate the ring.
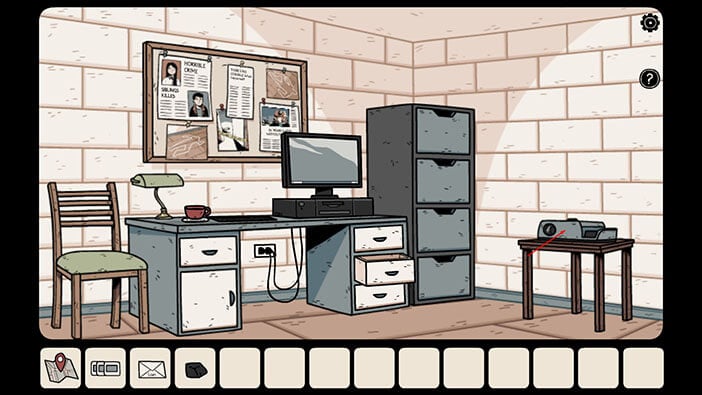
Ok, we should now go to the police station to take a look at the slides. To do that, first, tap on the map on your inventory and then tap on the “Police Station”.


Tap on the slide projector on your right to take a closer look at it.
Select the “Projector slides” from the inventory and tap on the projector to insert them.
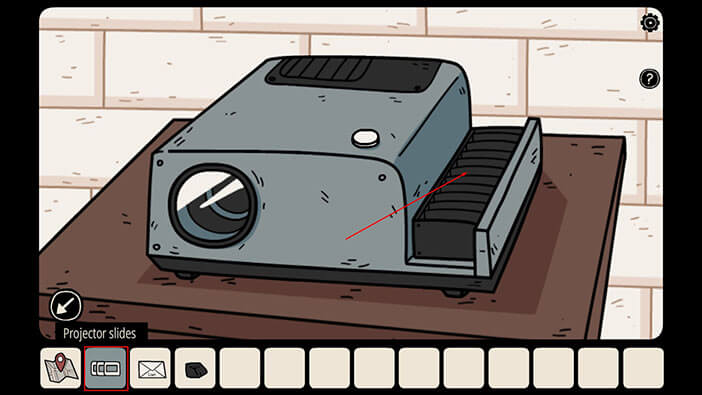
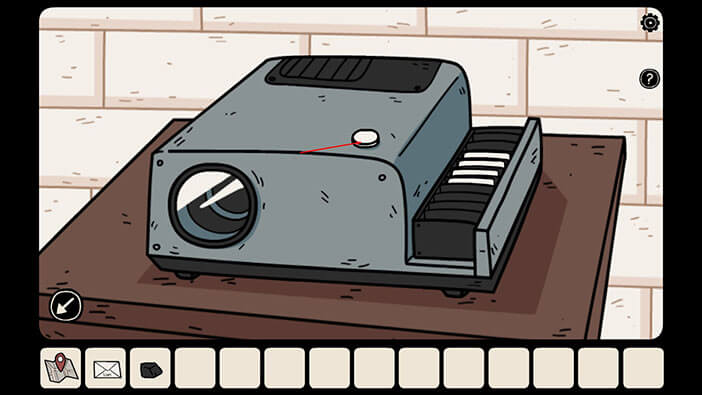
Finally, tap on the button on the projector to play the slides.
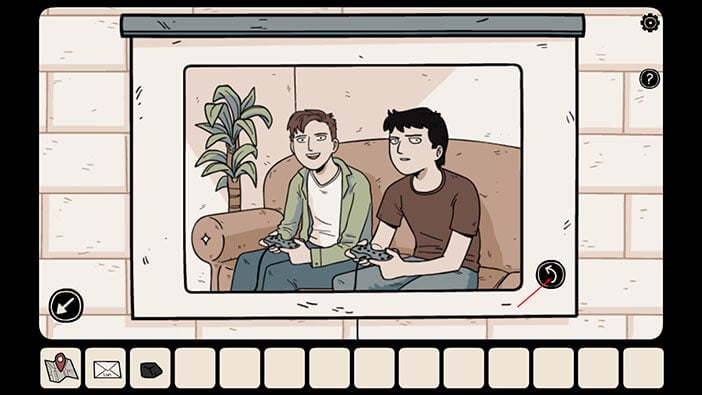
In the first picture, we can see the murdered boy playing video games with his friend.
Tap on the arrow in the lower right corner to go to the next slide.
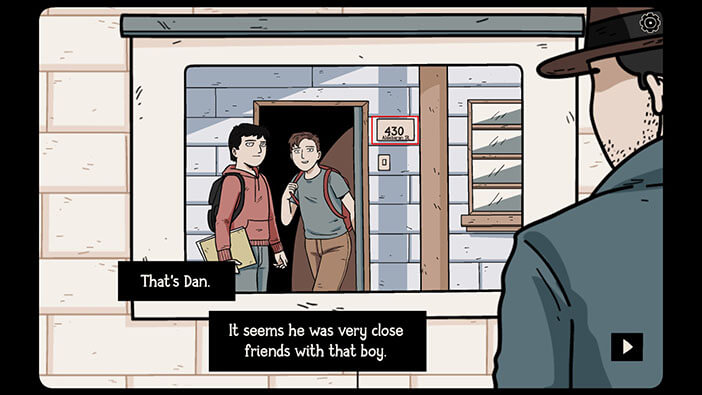
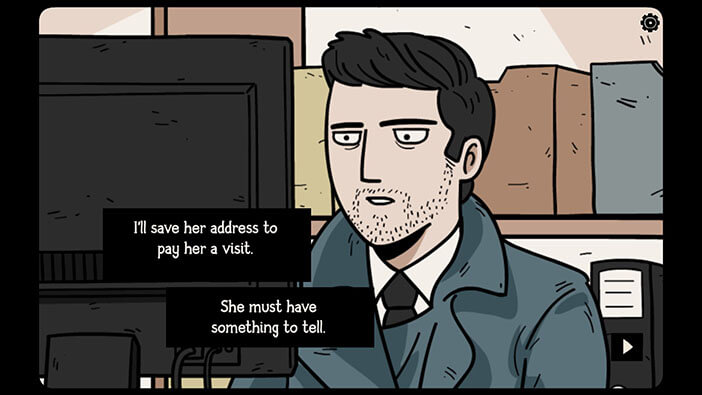
On the next slide, we can see the murdered boy and his friend preparing to go to school. The detective recognized the friend of the murdered boy. The name of the murdered boy was Dan, and we can see the address of his friend in the picture. So, our character detective Ren Larsen decided to go and pay him a visit. He also added the location of the house on our map.

Before we leave the Police station, tap on the arrow in the lower-left corner to see the other slides. Tap a few times (even after you see blank slides), and you will eventually find another owl. 

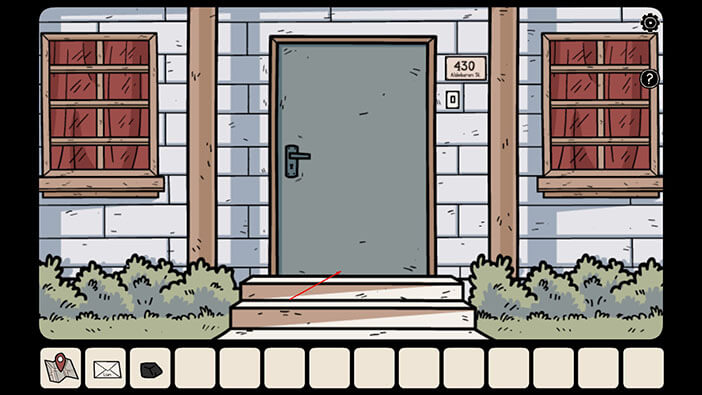
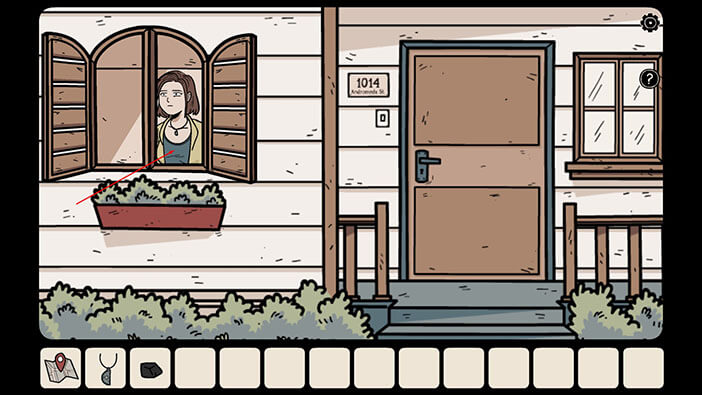
Ok, now let’s visit Dan’s friend. Tap on the map in your inventory to select it, and then tap on the “Lian’s House”.

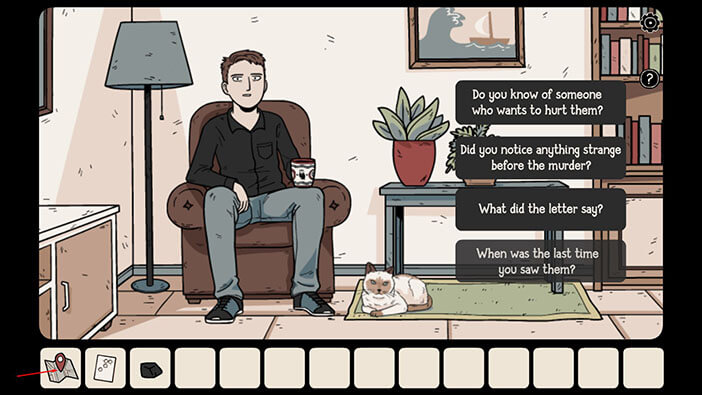
Tap on the doorbell to take a closer look, then tap again to ring the doorbell.


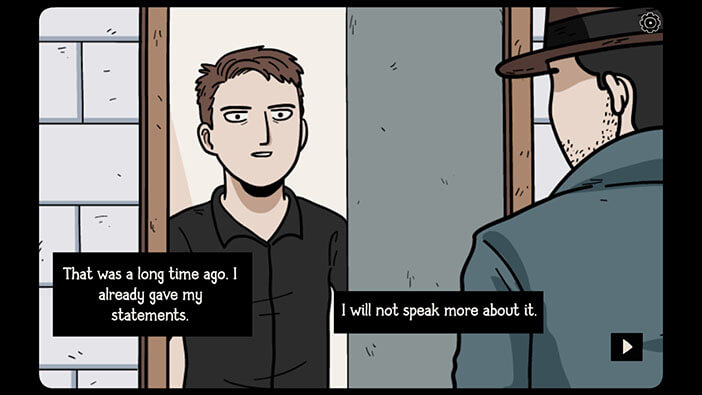
Well, it seems that Lian, Dan’s friend, doesn’t want to talk to us about the murder. We will have to find a way to convince him to talk to us.
First, tap on the bottom of the door to take a closer look. Next, tap on the “Letter to Lian” in your inventory to select it, then tap on the ground below the door and our character will slide the letter under the door.

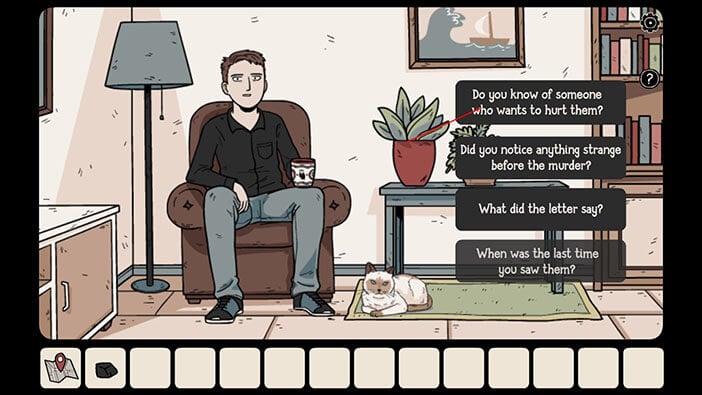
Well, after he saw the letter, Lian decided to talk to us, so let’s go inside and see what he can tell us.

Before we start, tap on the mug in Lian’s hand to take a closer look at it, and you will find another owl.


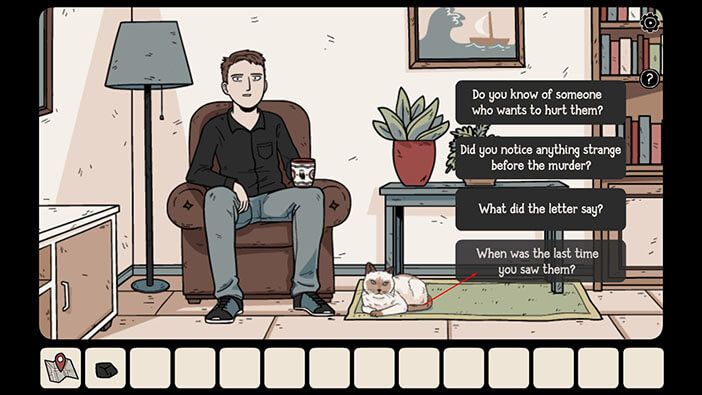
Ok, let’s get back to the conversation. Tap on the first question “Do you know of someone who wants to hurt them?”
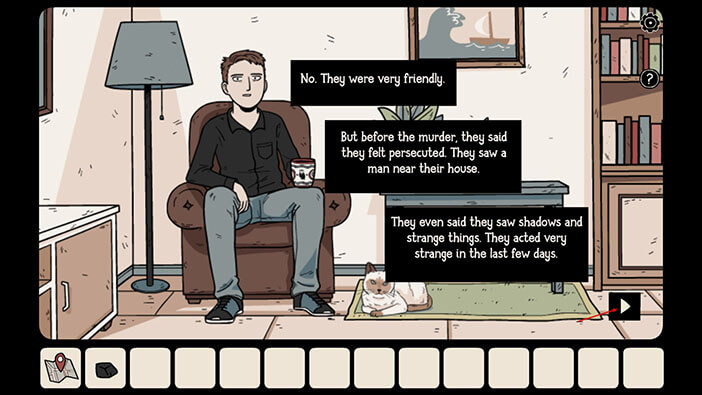
Lian said that Dan and his sister were very friendly and they didn’t have any enemies. However, it looks like someone has been stalking them a few weeks before the murders (we already knew that from the photos that we found in the “Murder House”). But, besides that, it looks like they started seeing some unnatural shadows a few weeks before they died. Maybe this case has a supernatural element? I wouldn’t be surprised since a lot of strange things are happening in Hidden Town.
Tap on the second question “Did you notice anything strange before the murder?”

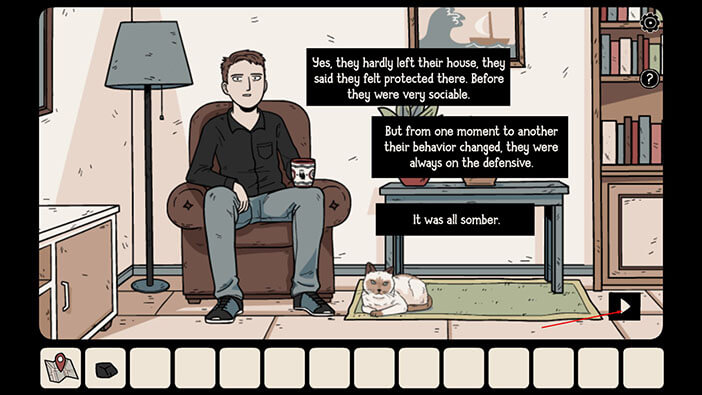
Well, since somebody was stalking them, Dan and his sister were afraid, so they rarely left the house.
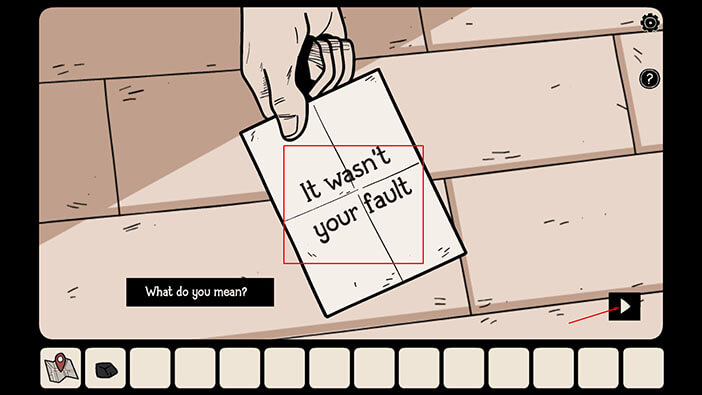
Tap on the third question “What did the letter say?”

“It wasn’t your fault” that’s all that is written in the letter, and our detective would like to know why would Dan write something like this to his friend Lian.
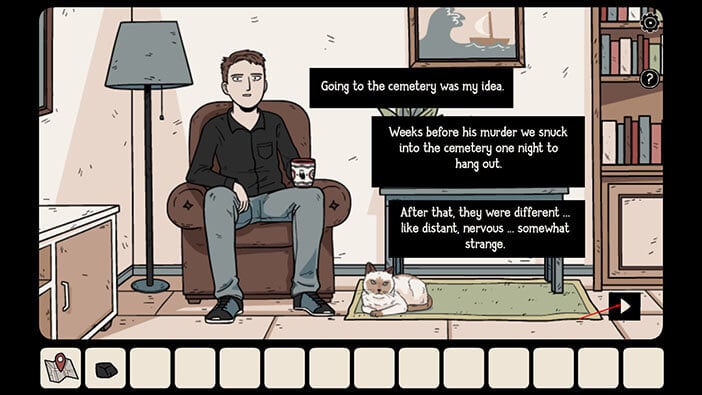
Well, Lian thought it would be a good idea to visit the cemetery at night, and Dan and his sister joined him. However, something happened to them that night at the cemetery, and they were in constant fear since then. Hmm, well now it looks even more possible that there are some supernatural elements in this case.
Tap on the last question “When was the last time you saw them?”
Lian saw them the day before the murder because they dropped by to return him the book. But there was something inside the book.
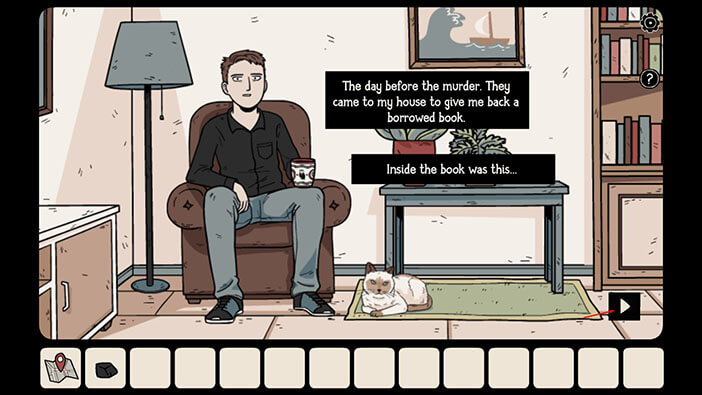
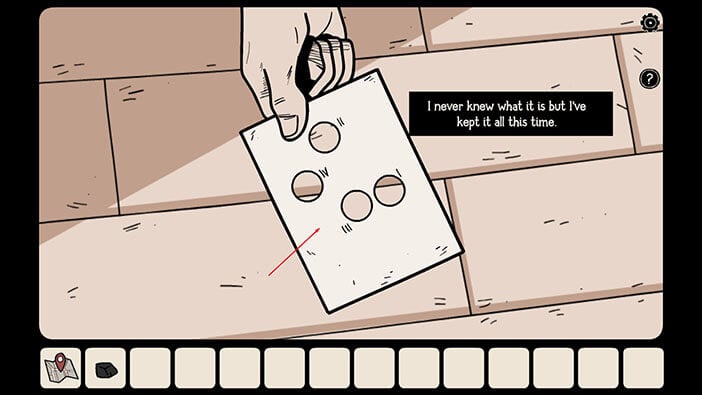
Tap on this item to pick it up, and a “Card with holes” will be added to your inventory.
Ok, we should now go back to the “Murder House” because we can use “Card with holes” to solve one more puzzle. So, tap on the map in your inventory to select it, and then tap on the “Murder House”.

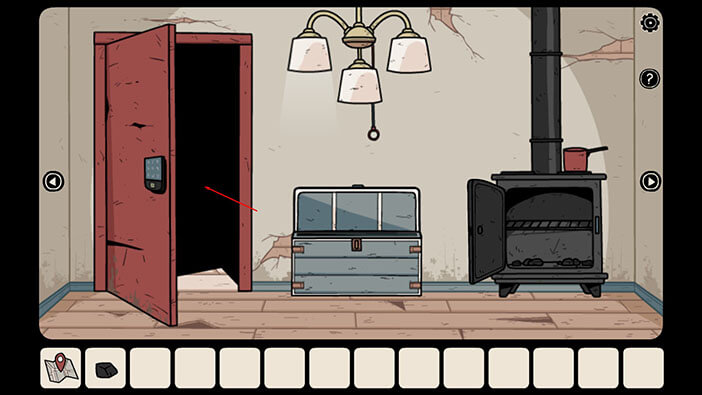
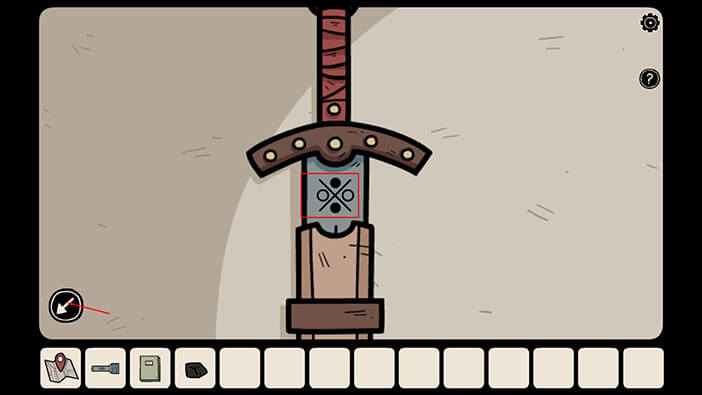
Ok, we can use the “Card with holes” to unlock the red door. This door is located in the first room on the left.
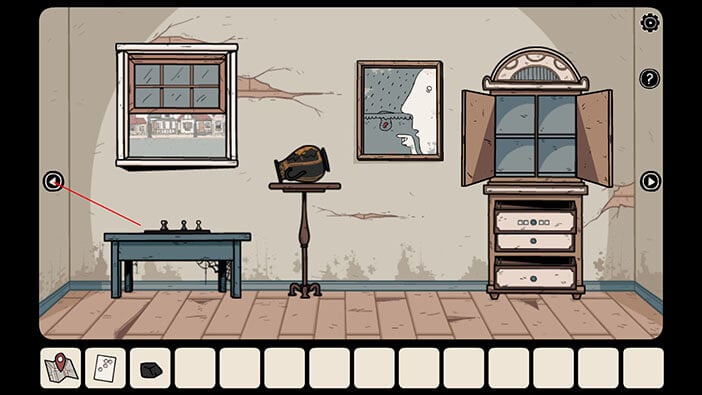
Tap on the door to take a closer look at it.
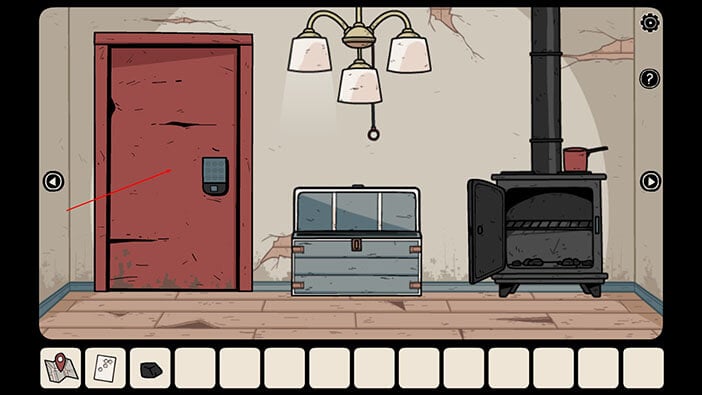
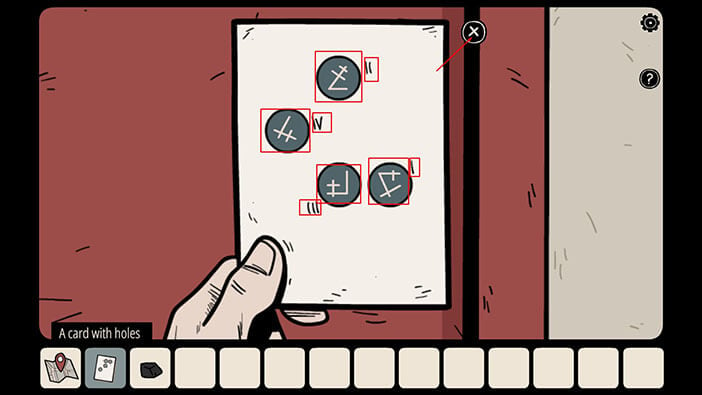
Here we can see 9 buttons, arranged in a 3×3 grid. Tap on the “Card with holes” in your inventory to select it, then tap on the grid.
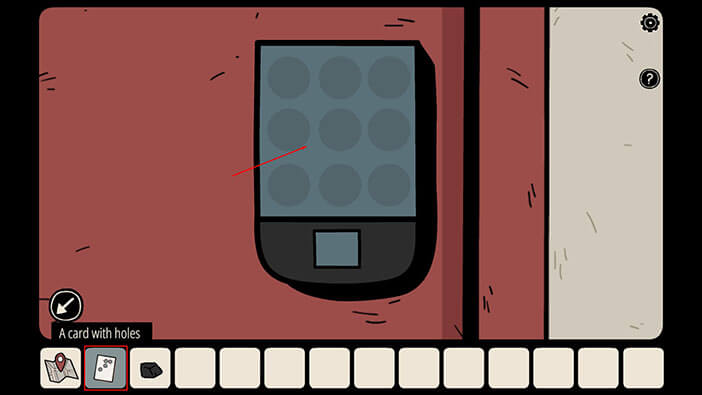
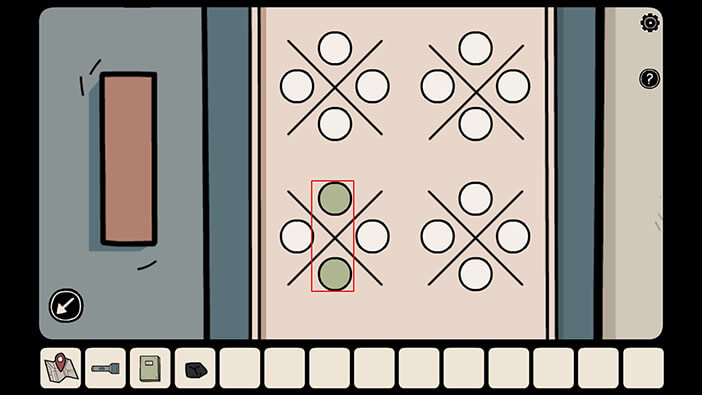
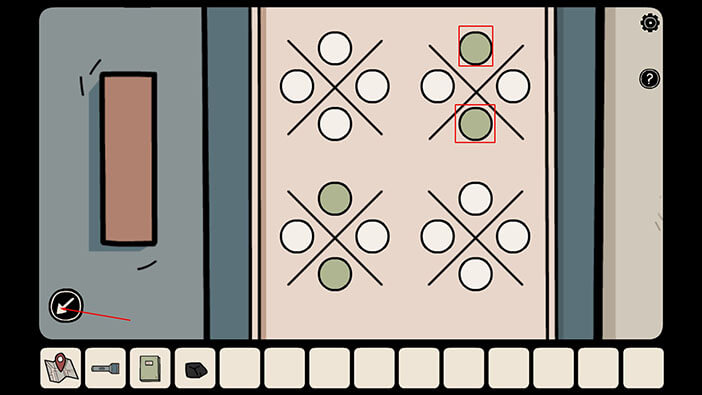
Now we can see four symbols and their order is marked by roman numerals. We don’t have to memorize the shape of the symbols in order to solve this puzzle. But, we have to memorize/write down the order of the symbols and their position on the grid. So, let’s do that.
First symbol = Third button (left to right) in the bottom row
Second symbol = Second button in the top row
Third symbol = Second button (left to right) in the bottom row
Fourth symbol = First button in the middle row
Once you’re done, tap on the “X” on the upper right corner of the paper.
NOTE: The order and the position of the holes on the paper will be different from game to game, but you can still use the same method to solve this puzzle.
So, let’s tap on the button in the same order as on the “Card with holes”.
Tap on the “OK” button once you’re done.

After entering the correct code, the door will automatically open, so tap on it to proceed into the next room.
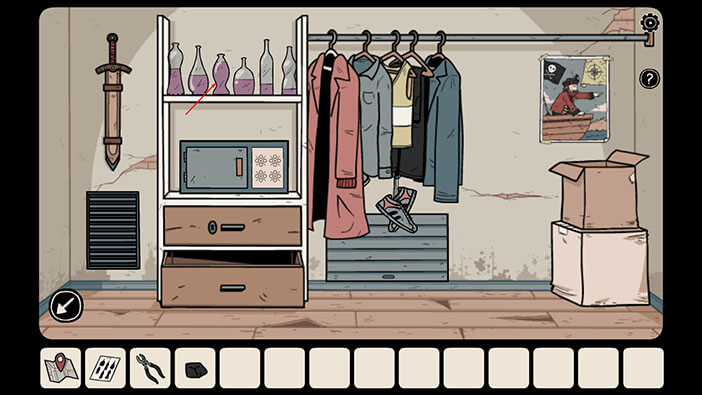
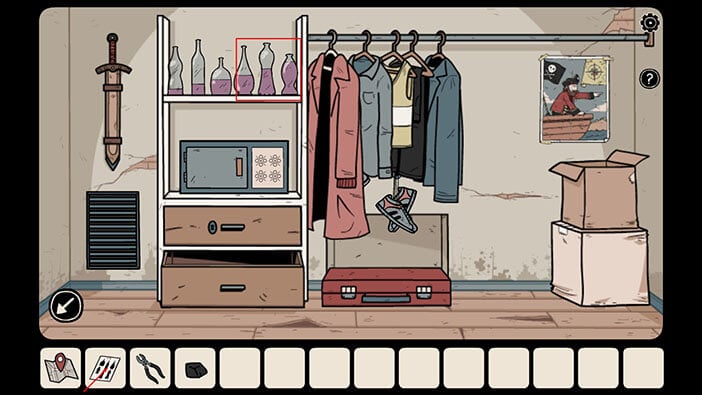
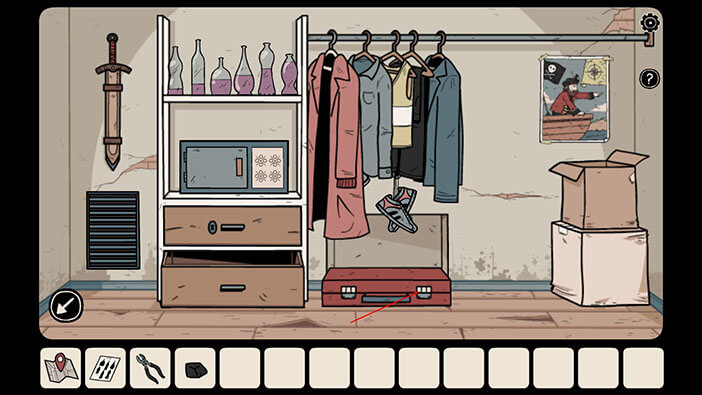
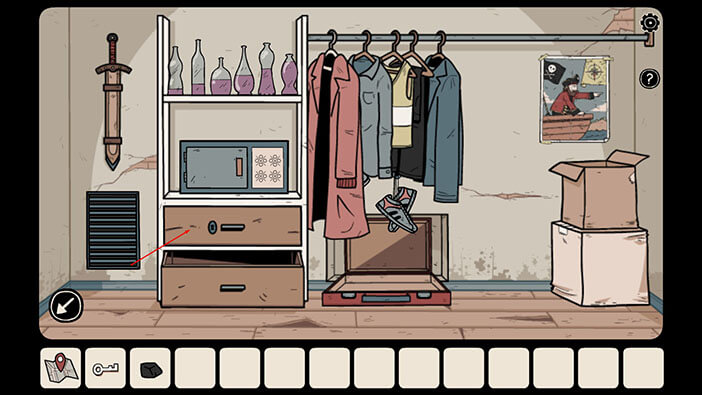
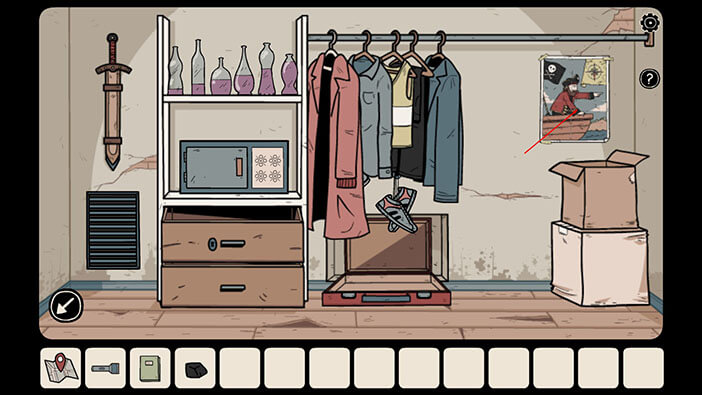
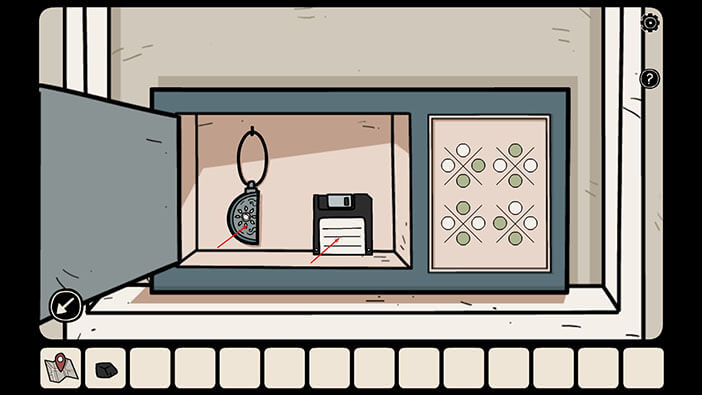
There are several important objects in this room. Just take note of the bottles on the top shelf and the pattern on the safe on the middle shelf. After that, tap on the bottom drawer to take a closer look at it and tap once more to open it.
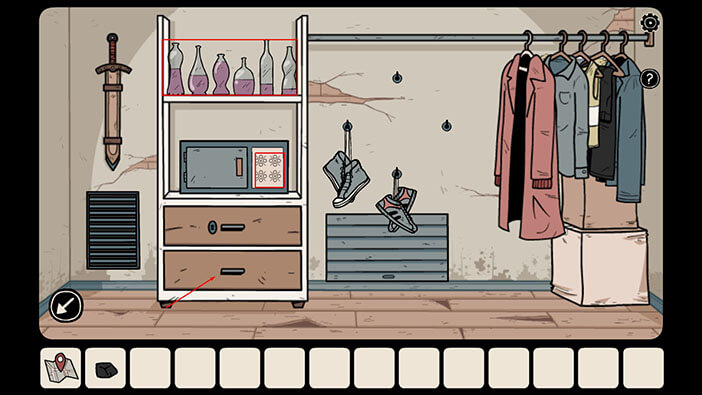
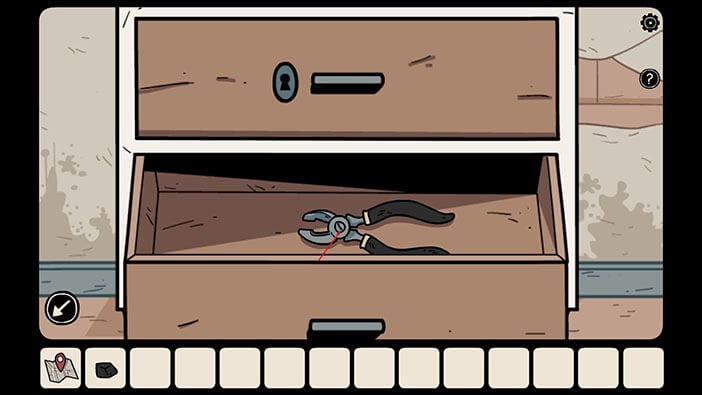
Tap on the item inside to pick it up, and a “Pair of pliers” will be added to your inventory.
Ok, now tap on the clothing to move it to the left.
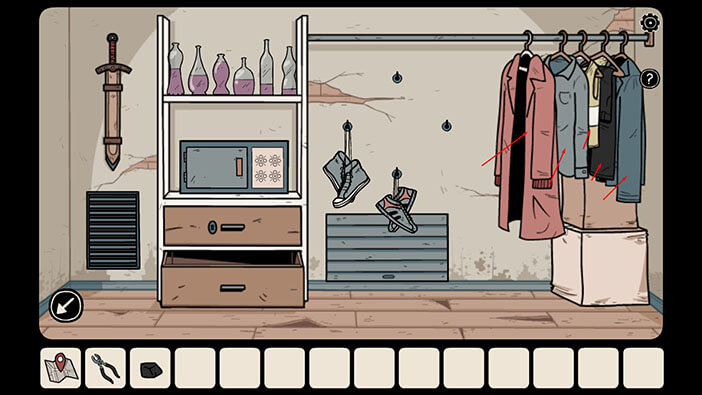
We can see that a box and a poster of a pirate were hidden behind the clothing. Tap on the box to take a closer look at it and tap once more to open it.
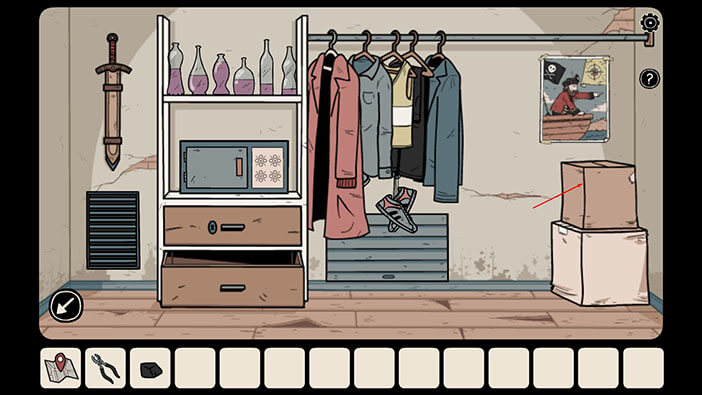
Tap on the note inside the box to pick it up.
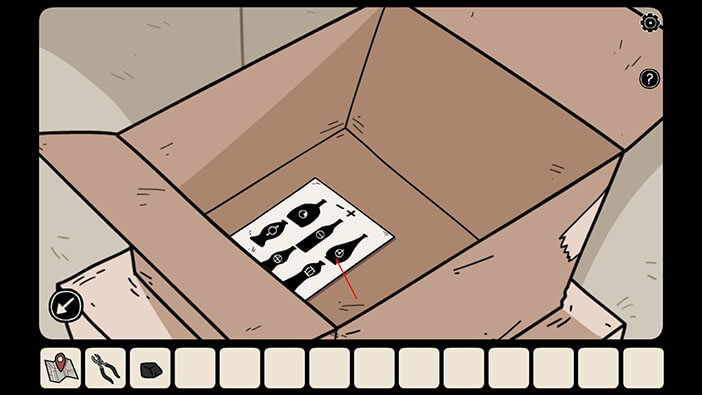
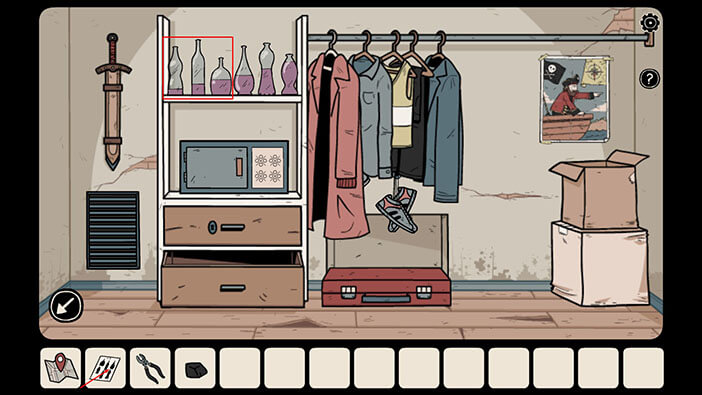
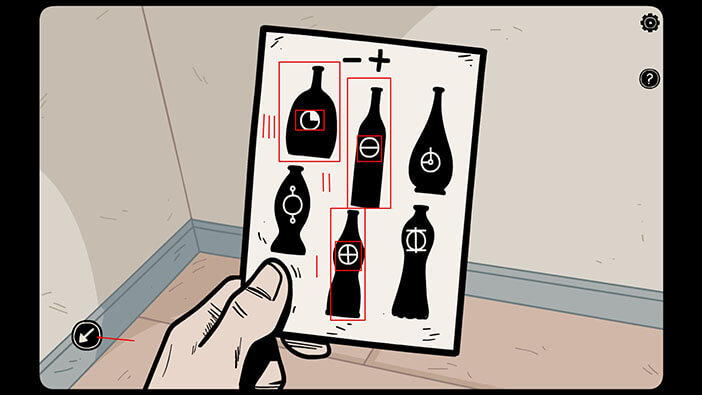
Now, pay attention again to the bottles on the top shelf, and then tap on the note with bottles in your inventory to examine it.
We can see the minus sign on the left and the plus sign on the right. This indicates that the bottles should be arranged by the amount of liquid inside, starting from the one with the least amount of liquid on the far left, and the one with the most liquid should be on the far right.
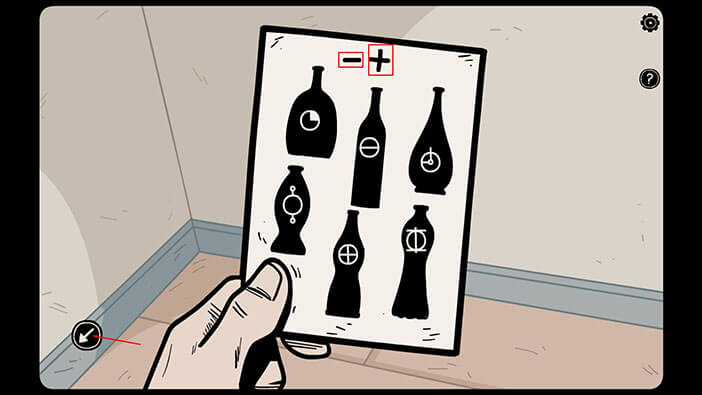
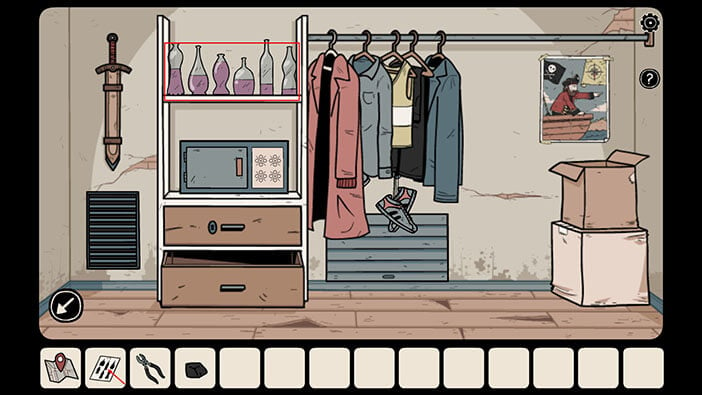
Let’s rearrange the bottles. First, tap on the top shelf to take a closer look.
Tap on the bottles to rearrange them.

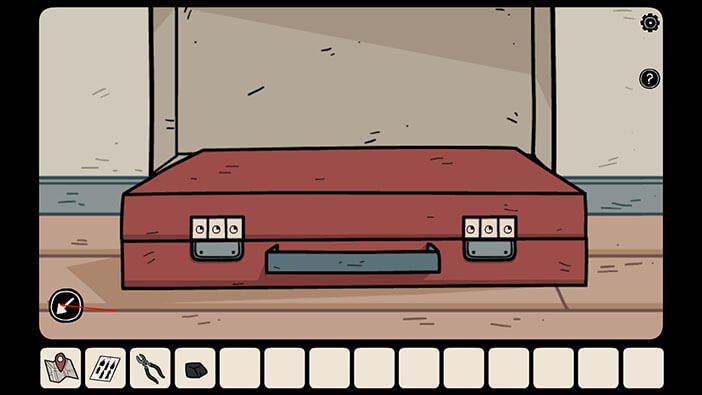
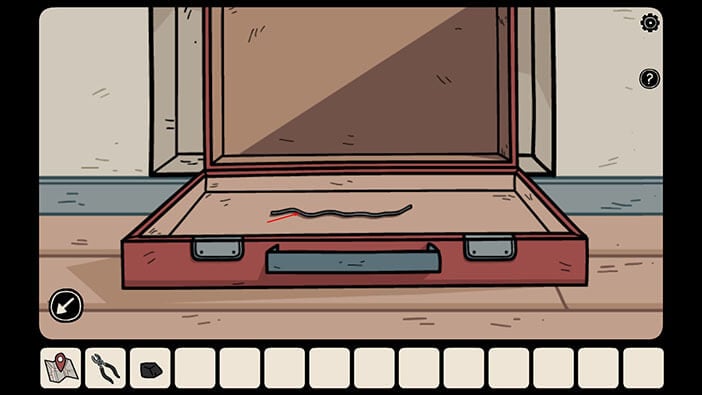
As soon as you properly arrange the bottles, you will hear the clicking sound and the secret compartment, below the snickers, will open. The suitcase will fall out of the compartment, so let’s tap on it to take a closer look.

The suitcase is locked by some combination of six symbols (three on the left and three on the right). The symbols on the suitcase are the same as the symbols on the six bottles on the note that we found. Now, we just have to determine the correct order of the bottles, and we will be able to unlock the suitcase.
Tap on the arrow in the lower-left corner to go back.
We already figured out the order of the bottles when we arranged them on the top shelf. Now, we just have to take a look at the shape of the first three bottles (left to right) on the shelf and find the bottles of the same shape on the note.
So, let’s first memorize/draw the first three bottles on the shelf.
After that, tap on the note to take a look at it.
Ok, after we found the bottles of the matching shape, we should now write down/memorize their symbols.
First symbol = Circle with the cross
Second symbol = Circle with a horizontal line
Third symbol = Circle with the colored (black) upper right quarter (it’s white on the bottle, but black on the suitcase)
Tap on the arrow in the lower-left corner to put down the note, once you’re done.
NOTE: The symbols on the bottles will vary from game to game, but you can still solve this puzzle by using the same method.
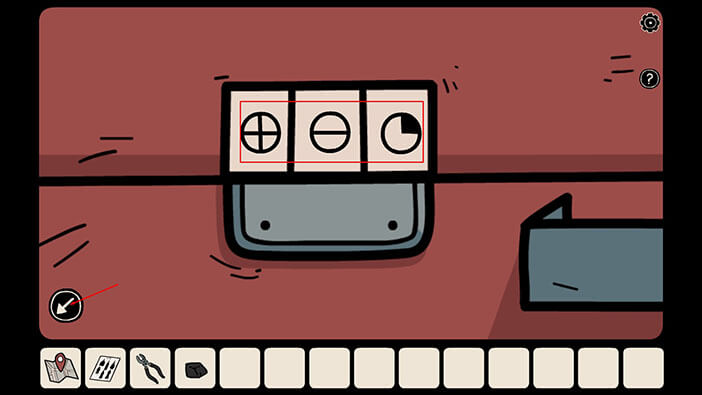
Ok, now let’s enter the first three symbols. Tap on the suitcase to take a closer look, then tap on the fields on the left to start the interaction.


Tap on the fields and enter the first three symbols. We had,
The First symbol = Circle with the cross
The Second symbol = Circle with a horizontal line
The Third symbol = Circle with the colored (black) upper right quarter (it’s white on the bottle, but black on the suitcase)
Well, that’s half of the job done. Let’s tap on the arrow in the lower-left corner to go back, and take a look at the other three bottles.
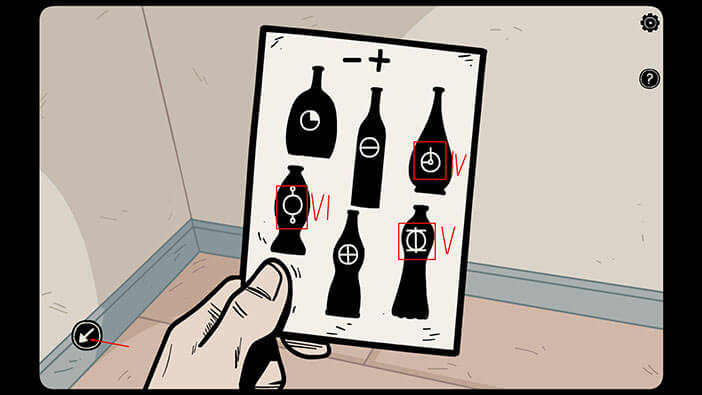
Now, let’s take a look at the shape of the last three bottles (left to right) on the shelf and find the bottles of the same shape on the note.
So, let’s first memorize/draw the first three bottles on the shelf.
After that, tap on the note to take a look at it.
Ok, after we found the bottles of the matching shape, we should now write down/memorize their symbols.
The fourth symbol = Looks like a clock
The fifth symbol = Circle with two horizontal lines below and above it and intersected by one vertical line
Sixth symbol = Circle with two smaller circles above and below it
Tap on the arrow in the lower-left corner to put down the note, once you’re done.
Ok, now let’s enter the other three symbols. Tap on the suitcase to take a closer look, then tap on the fields on the right to start the interaction.

Tap on the fields and enter the other three symbols. We had,
The fourth symbol = Looks like a clock
The fifth symbol = Circle with two horizontal lines below and above it and intersected by one vertical line
Sixth symbol = Circle with two smaller circles above and below it

As soon as you enter the correct combination of symbols the suitcase will open. Tap on the items inside of it to pick it up and a “Wire” will be added to your inventory.
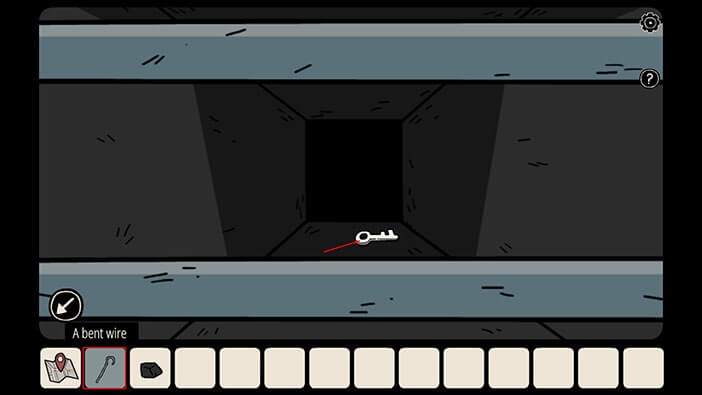
Ok, let’s tap on the vent on our left to take a closer look.
We can see a key inside, but we can’t reach it. Tap on the “Pair of pliers” in your inventory to select it, then tap on the “Wire”. Our character will use the pliers to bend the wire and a “Bent Wire” will be added to your inventory.
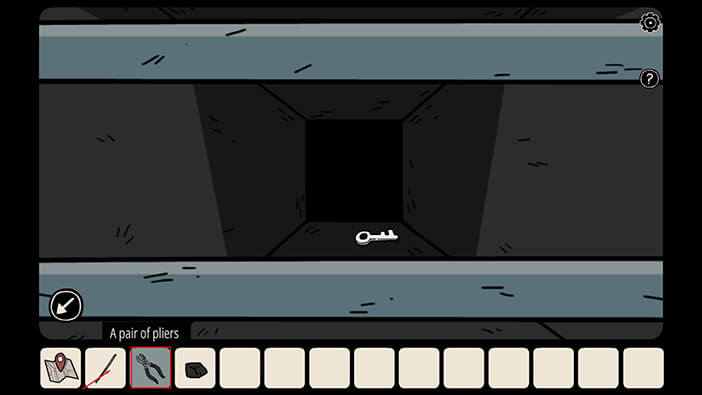
Well, we can now reach the key by using the wire. So, tap on the “Bent Wire” in your inventory to select it, then tap on the key inside the vent. Our character will be able to reach it and a “White Key” will be added to your inventory.
We can use this key to unlock the drawer in this room, so let’s do that. First, tap on the top drawer to take a closer look at it.
Tap on the “White Key” in your inventory to select it, and then tap on the keyhole to unlock the drawer. After that, tap on the drawer to open it.
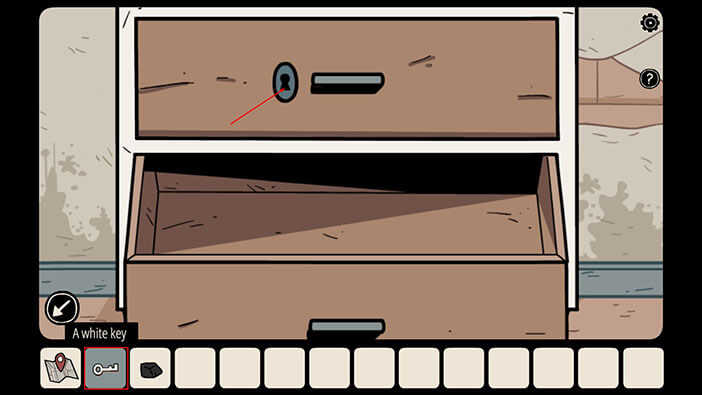
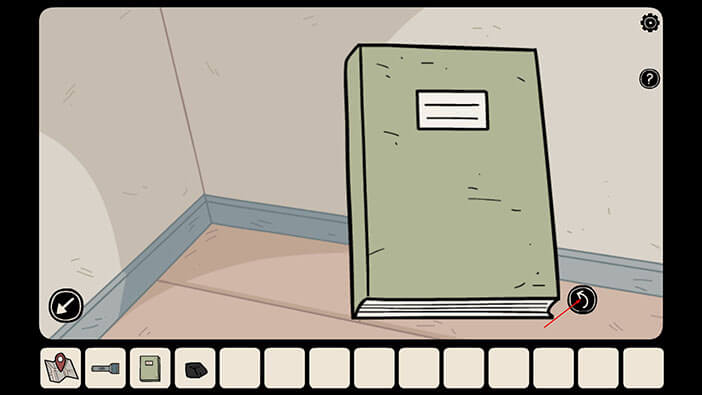
Inside you will find a “Flashlight” and a “Green Book”. Tap on these items to pick them up.

We should now read the book and look for clues. So, tap on the “Green Book” in your inventory to pick it up.
Tap on the arrow in the lower right corner of the book to flip through the pages. Go to the last page.
Here we can see four symbols a skull with the crossed bones (Pirate symbol), ventilation bars, a sword, and snickers. We should write down/memorize the position of these items because we will need that for the next puzzle. So, we have
Top Left = a Skull with the crossed bones
Top Right = Ventilation bars
Bottom Left = Sword
Bottom Right = Snickers
Once you’re done, tap on the arrow in the lower-left corner to put down the book. 
I mentioned earlier that you should take note of the symbols on the safe, located on the middle shelf. Here we can see that the symbols are arranged in the same pattern as the items in the book (two at the top and two at the bottom). This will be important very soon.
For now, let’s tap on the ventilation on our left to take a closer look at it, again. 
The inside of the vent is dark. So, let’s tap on the “Flashlight” in our inventory to select it, and then tap on the inside of the vent.
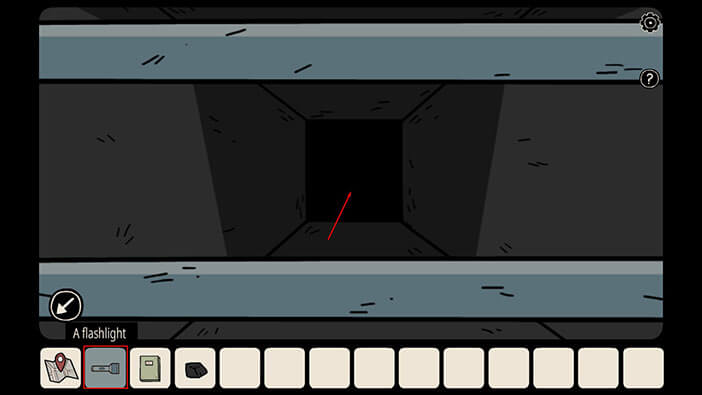
Well, inside the vent we found a symbol that looks just like the ones on the safe, except this one has two black dots. We should write down memorize the position of the dots, and where we found them. So,
Vent = one black dot at the top, and one black dot at the bottom
Tap on the arrow in the lower-left corner to go back once you’re done.
NOTE: The black dots on all four items (skull with crossed bones, vent, sword, snickers) will be randomized in each game (sometimes top and bottom dots will be black, sometimes left and rights dots will be black, etc.). However, you can still solve this puzzle by using the method that we explained in this walkthrough.
Ok, now let’s tap on the sword on the wall to take a closer look at it.

Tap on the sword again to unsheathe it.
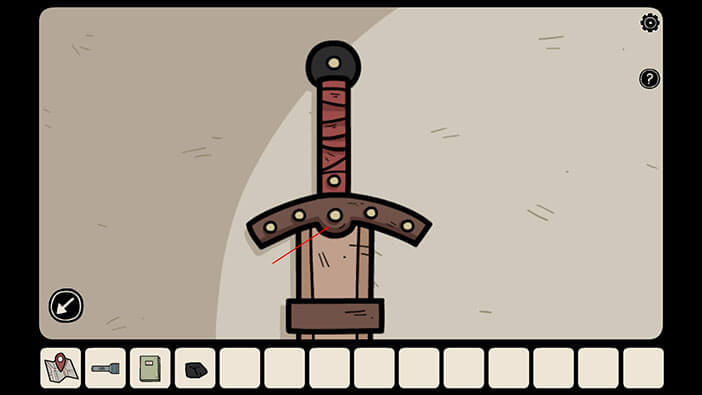
Well, we found another symbol on the sword blade. We should write down memorize the position of the dots, and where we found them. So,
Sword = one black dot at the top, and one black dot at the bottom
Tap on the arrow in the lower-left corner to go back once you’re done.
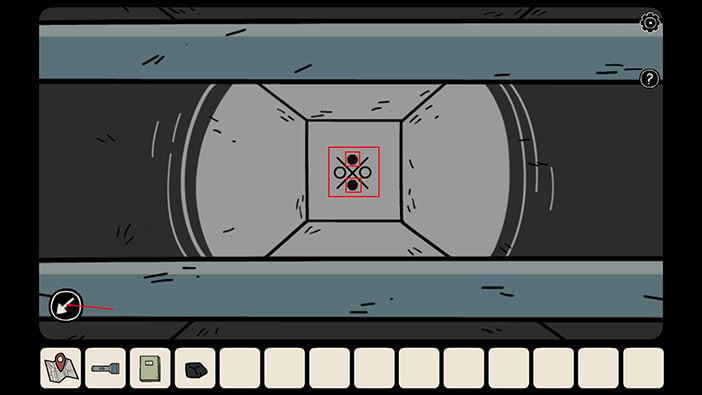
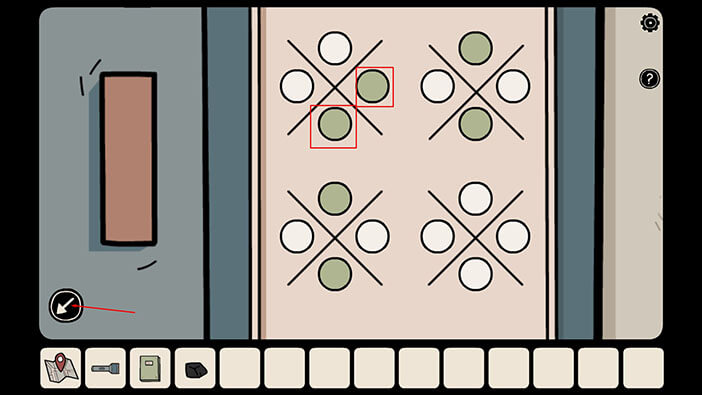
Ok, now let’s use this information. Tap on the symbols on the safe to take a closer look.

As I already mentioned, the symbols are arranged in the same pattern as the items (skull with crossed bones, vent, sword, snickers) in the book.
We discovered that the top and bottom dots on the sword are black. In the book, the sword is located in the bottom left position (tap on the book if you need a reminder). So, these (top and bottom) dots should be black on the symbol at the bottom left position. Tap on them.
We also discovered that the top and bottom dots are black on the symbol inside the vent. In the book, the vent is located in the top-right position. So, these (top and bottom) dots should be black on the symbol at the top-right position. Tap on them.
After that, tap on the arrow in the lower-left corner to go back.
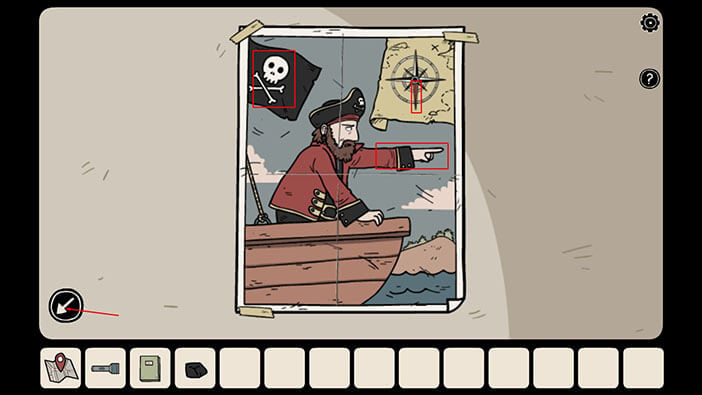
Ok, now let’s take a closer look at the poster of a pirate. Tap on it.
There are no dots here, but we can see two interesting things. First, the pirate is pointing to the right. Second, the compass is pointing down. Those are our two indicators for the position of the black dots. We should write down memorize the position of the dots, and where we found them. So,
Pirate (skull with crossed bones) = one black dot at the right, and one black dot at the bottom
Tap on the arrow in the lower-left corner to go back once you’re done.
Let’s use this information. Tap on the safe to start the interaction.

We discovered that the right and bottom dots should be black, by looking at the pirate poster. In the book, the Pirate sign is located in the top-left position. So, these (right and bottom) dots should be black on the symbol at the top-left position. Tap on them.
After that, tap on the arrow in the lower-left corner to go back.
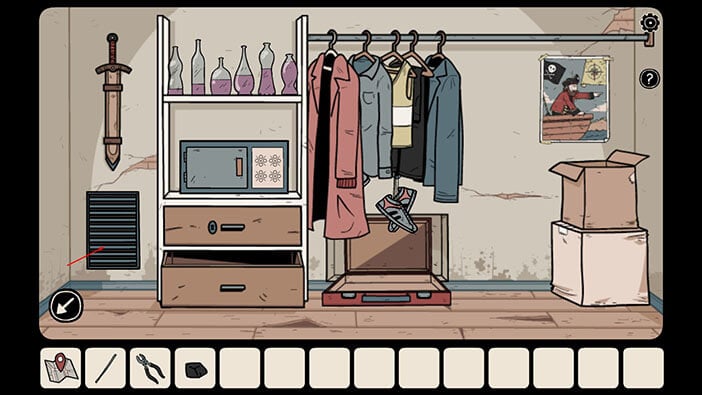
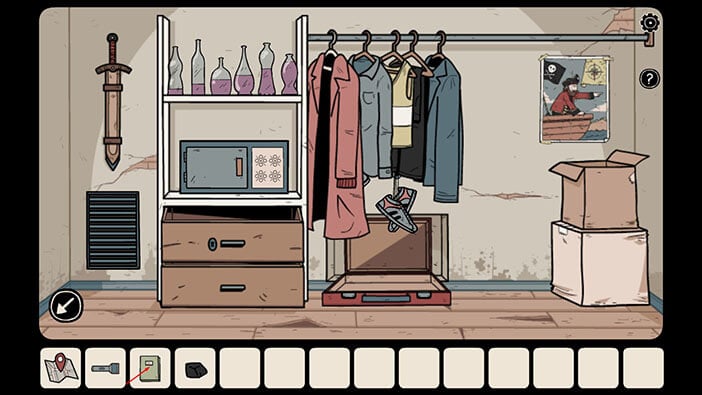
Ok, now let’s tap on the clothing again to move it to the right.

Here we can see that the snickers are hanging from the left and the bottom hook. So, the black dots on the symbols that is at the bottom right (the same as the snicker) should be also black. Let’s do that.
We should write down memorize the position of the dots, and where we found them. So,
Snickers = one black dot at the left, and one black dot at the bottom
After that, tap on the safe to start the interaction.
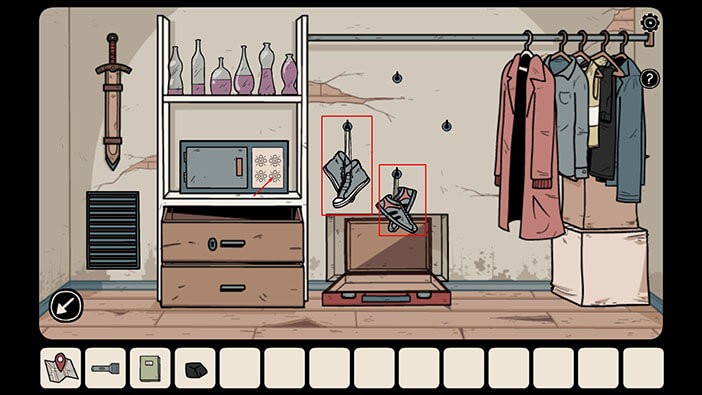
In the book, Snickers are located in the bottom right position. So, the left and bottom dots should be black on the symbol at the bottom right position. Tap on them.
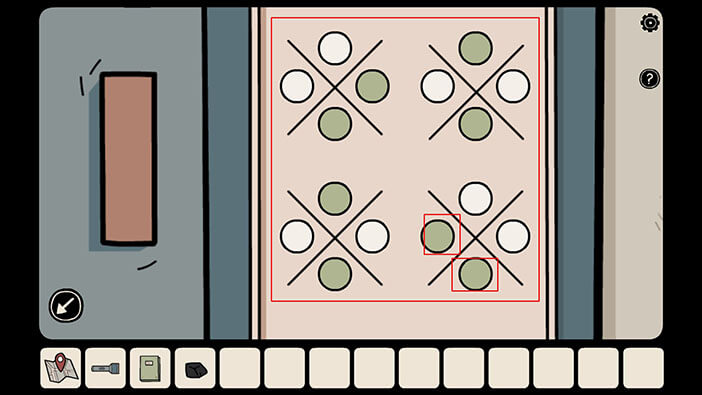
As soon as you enter the correct combination of dots, you will hear the clicking sound and the safe will automatically open. There are two items inside the safe. Tap on them to pick them up, and a “Floppy disk” and a “half of the broken medallion” will be added to your inventory.
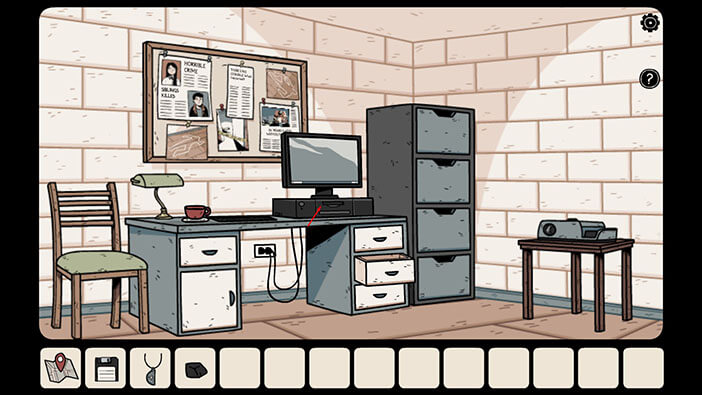
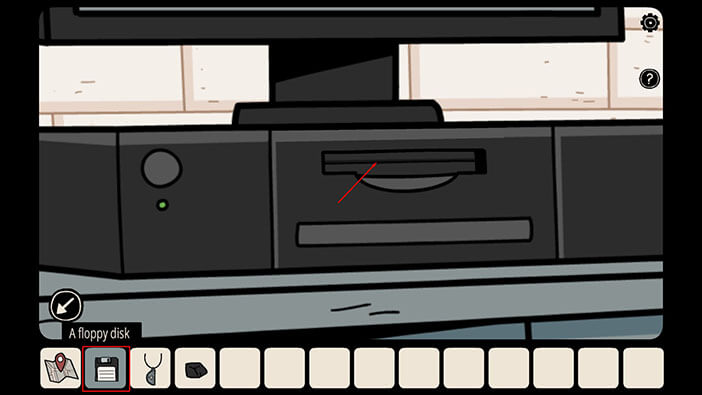
In order to play the floppy disk, we have to go back to the police station, so let’s do that. First tap on the map in your inventory to bring it up, then tap on the police station.


Tap on the computer to take a closer look at it.
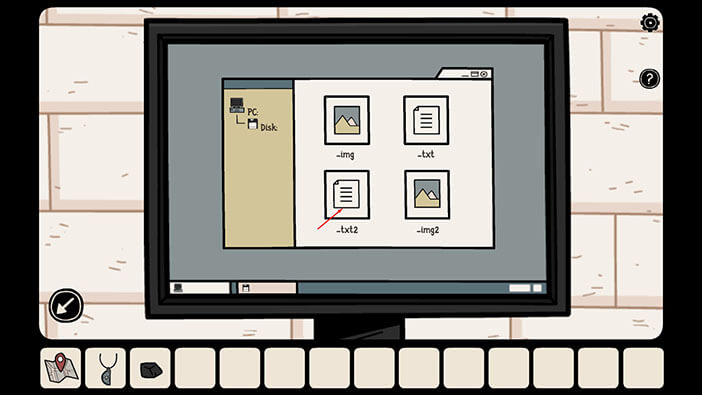
Tap on the “Floppy disk” in your inventory to select it, then tap on the floppy drive to play it.
Let’s first take a look at the images.
In the first picture, we can see the murdered girl with a friend.
In the second picture, we can see both, the murdered siblings and her friend. It seems that this image was taken in front of the cemetery, possibly on the night when the kids had their little adventure.


Ok, now let’s take a look at the text file.

Well, it seems that the name of the friend is Anna, and she moved a few days before they went to the cemetery. So, this could still be her address.
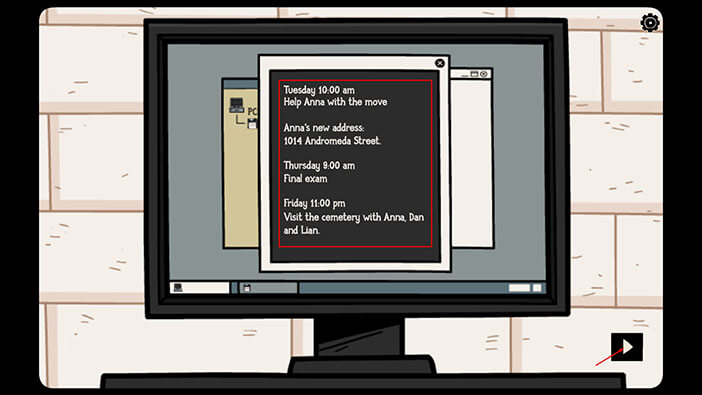
Detective Ren decided that he should visit Anna and have a chat with her, so he added the location of her house on the map.
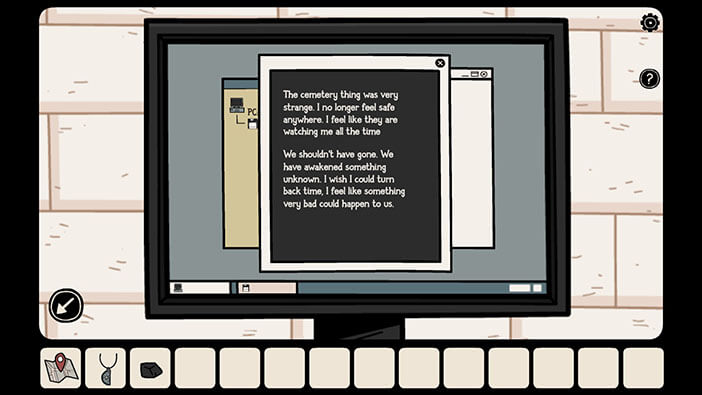
Before we go to Anna, let’s take a look at text file number 2.
Well, Dan’s sister thinks that they awakened some kind of an evil being when they were at the cemetery, and she thinks that something is stalking her. Interesting…
Ok, let’s visit Anna and see what we can find out. First tap on the map in your inventory to bring it up, then tap on the new location “Anna’s house”.

Just like before, tap on the doorbell to take a closer look at it, then tap again to ring the doorbell.
Well, Anna doesn’t want to talk to Ren, so we will have to find a way to persuade her.

Tap on the window to approach Anna.
Tap on the “half of the broken medallion” in your inventory to select it, and then tap on Anna.
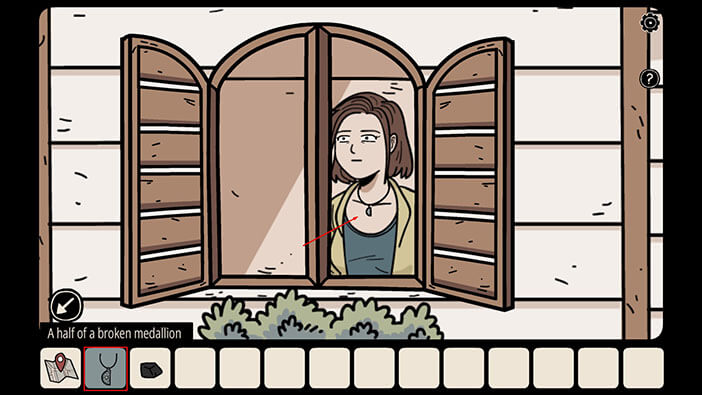
After she saw our half of the medallion, Anna presented her half and assembled the medallion. After that, she decide to let us in and talked to us. Before we talk to Anna, let’s tap on the bottle on the right, because there’s another owl on the label.
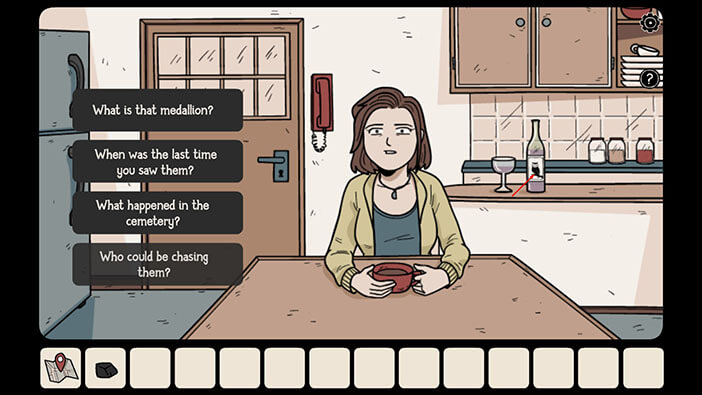

Let’s tap on the first question “What is that medallion?”

Apparently, it’s just a token of a friendship between Mia (the murdered girl) and Anna.

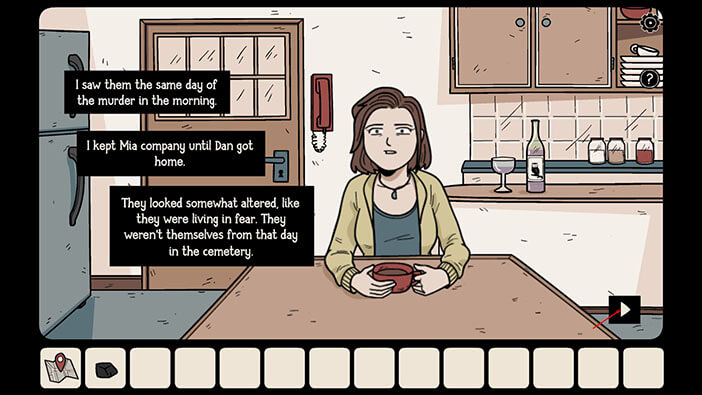
Let’s ask her the second question “When was the last time you saw them?”

Well, this is interesting, Anna saw them on the day of the murder. Well, we already know that they were terrified, so that’s nothing new.
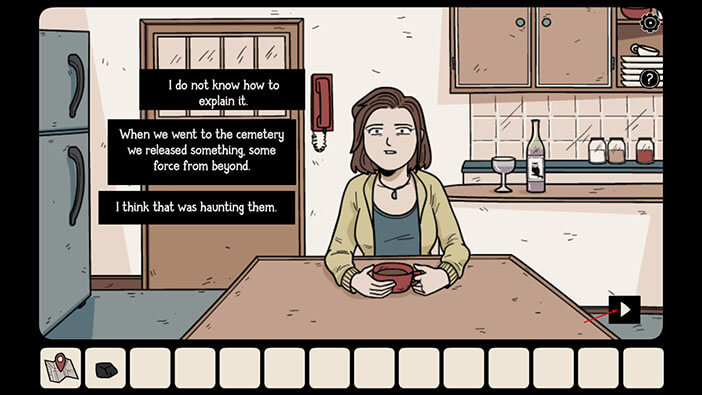
Let’s ask her the third question “What happened in the cemetery?”

Oh, that’s new. They opened a tomb when they were at the cemetery, and Anna thinks that they released something evil. The murdered siblings had the same feeling… Well, this is slowly turning into a horror story…

Let’s ask her the last question “Who could be chasing them?”

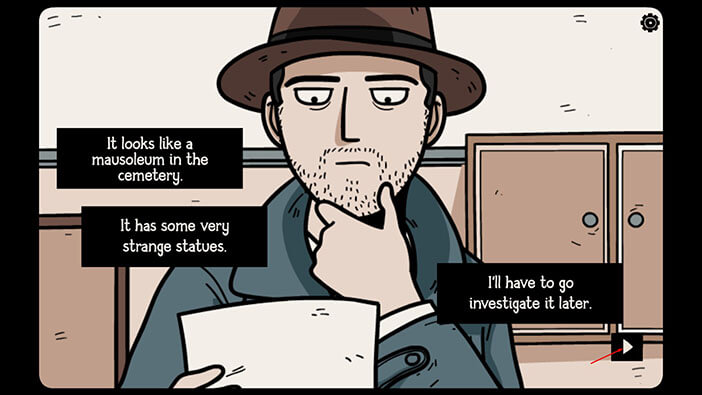
Well, this is getting very creepy. Anna thinks that they released some kind of an evil, undead force. Fortunately for us, Mia drew the picture of the tomb, so we might be able to find it.

Well, detective Ren decides to go to the cemetery and look for this crypt. But first, he added the location of the graveyard on the map, so we unlocked another location.
Ok, let’s find that crypt. First tap on the map in your inventory to bring it up, then tap on the “Graveyard”.


After searching for some time, detective Ren finally found the crypt and discovered the name of the man buried inside. “Frederick Nolsen”.
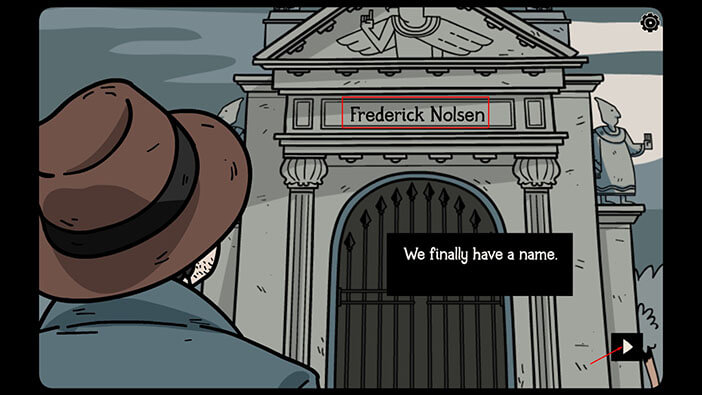
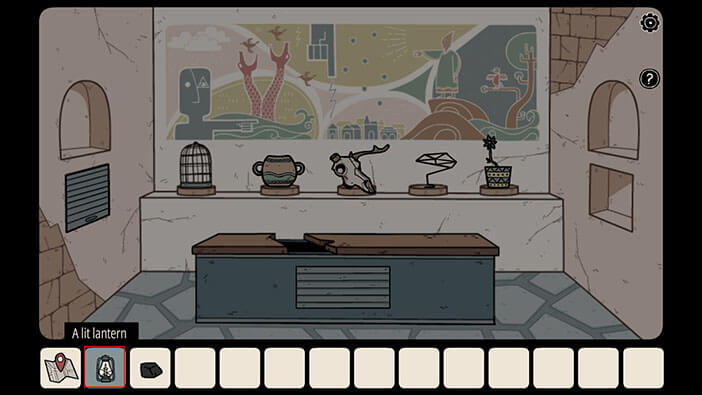
The detective decided to go into the crypt and investigate, and this is where the story continues. First, let’s pick up some items. Tap on the lantern on your left and on the matches on your right to pick them up.
By combining the “Matches” and the “Lantern” we will get the “Lit Lantern”.
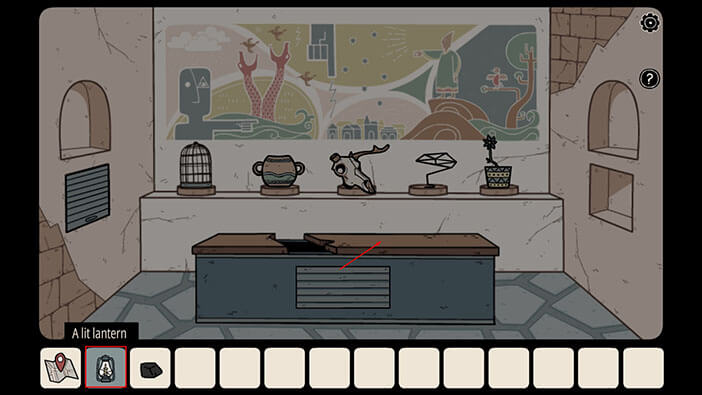
Ok, tap on the “Lit Lantern” in your inventory to select it, and then tap on the coffin to place it.
It seems that the coffin has been broken. Let’s tap on it to take a closer look.
It seems that the coffin has been broken. Let’s tap on it to take a closer look.

Well, it seems that the tomb is empty. So, if Frederic Nolsen was buried here, either somebody took his body, or he became some manner of undead creature, and walked away. Creepy…

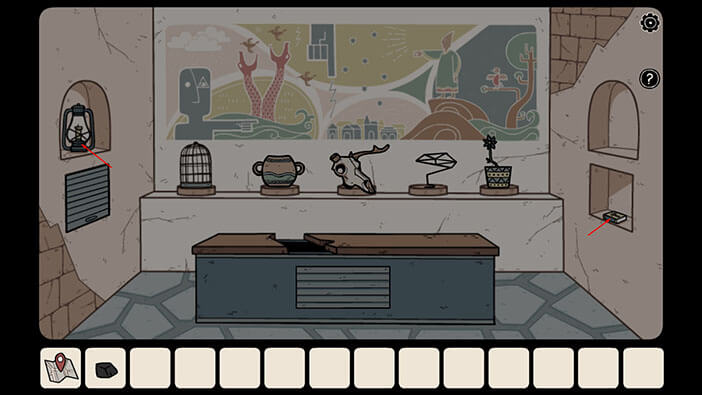
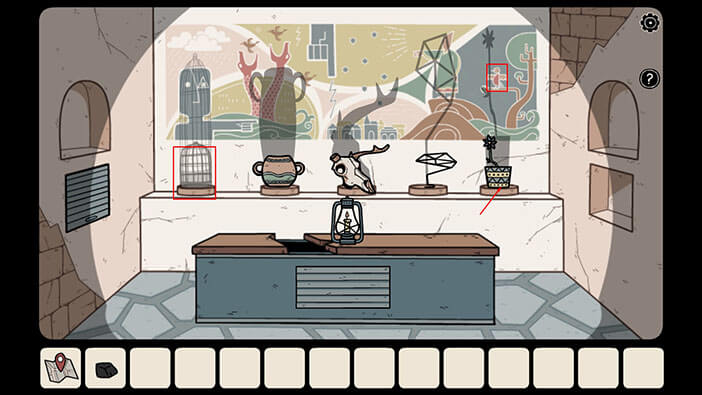
Ok, now let’s take a look at the shadows and the paintings on the wall in front of us. Here we can see five items, a birdcage, a ceramic pot, a deer skull, some kind of wire structure, and a plant. Pay attention to the shadows that these objects cast. To solve this puzzle we should rearrange the objects, and in doing so their shadows will supplement the paintings on the wall. Let’s start with something easy.
Looking from left to right, we can see that the birdcage is in the first position. If we take a look at the fifth position (far right) we can see a painting of the bird. So, let’s tap on the cage to select it, and then tap on position number 5 (plant). The birdcage and the plant will change places.
NOTE: The order of the objects might be different in your game (randomized puzzle), but the painting on the wall will always remain the same, so it will be fairly easy to solve this puzzle.
Well, if we now take a look at the wall, we can see that the bird is in the “cage” formed by the shadow. Let’s do the same thing with the other objects.
Let’s tap on the deer skull to select it, and then tap on the ceramic pot (deer skull should be at position number 2).
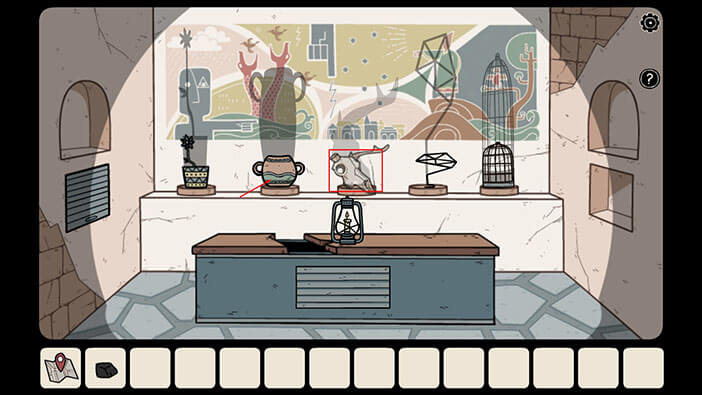
We can see that now, the horn of the skull forms a shadow that looks like a third snake. Let’s continue.
Tap on the ceramic pot to select it and then tap on the plant (the ceramic pot should be at position number 1).
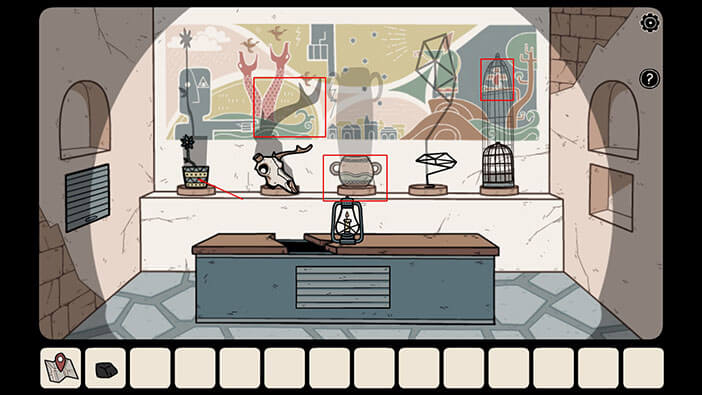
The shadow of the ceramic pot now forms the ears of the statue painted on the wall.
Finally, tap on the plant to select it and then tap on the wire structure (the plant should be in position number 4, and the wire structure should be in position number 3). After this step, we will solve the puzzle.
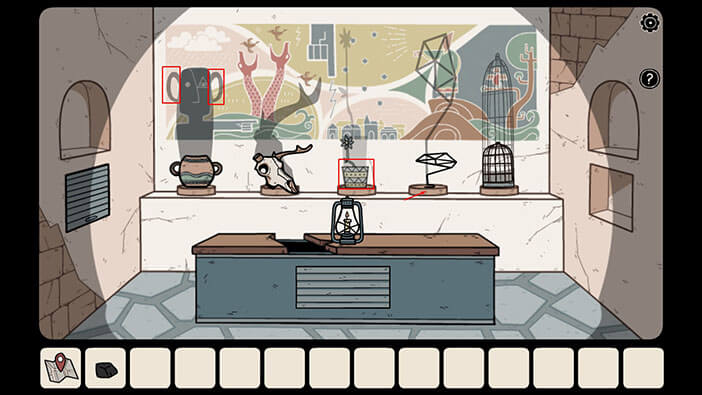
After the last step, the shadow of the wire structure connected the stars, while the plant shadow of the plant is in the hand of the man painted on the wall.
As soon as we properly arranged the objects, a secret compartment on the left opened. Also, the lid on the front of the coffin opened, revealing some kind of a puzzle.
Let’s tap on the secret compartment on our left to take a closer look at it. 
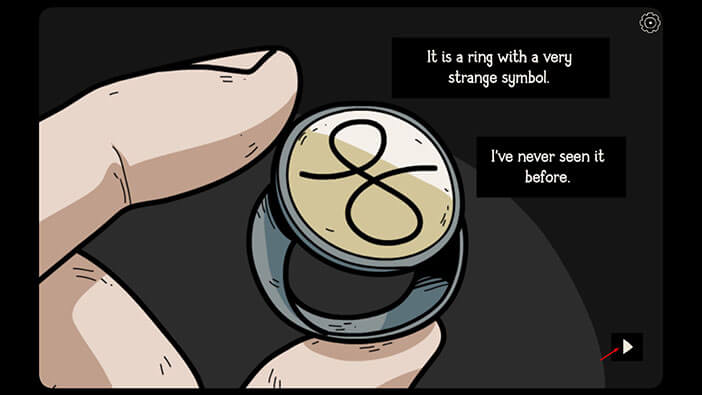
There’s a ring inside. Tap on the ring to pick it up.

Well, detective Ren thinks that this ring is very strange, and wants to investigate it.

To investigate the ring, we will have to go back to the police station. However, we will end the second part of the walkthrough here. You can check out the third part by tapping on the “Part III” button.
Part I Part III